Difference between revisions of "HANcoder/Training Material/AutomaticLightControlSystem/3"
DJSlofstra (talk | contribs) (Created page with " '''Go to part 4''' =LED Control System Part 3= ==Part 3: == ===Introduction to Simulink=== HANcoder/Examples/Automa...") |
DJSlofstra (talk | contribs) |
||
| Line 3: | Line 3: | ||
=LED Control System Part 3= | =LED Control System Part 3= | ||
| − | ==Part 3: == | + | ==Part 3: Compiling the model and flashing it onto the Olimexino== |
| + | |||
| + | The Simulink model is now ready to compile and be programmed to the Olimexino. | ||
| + | Build your model. | ||
| + | |||
| + | [[File:p1figure8.png|100px]] | ||
| + | |||
| + | ''Figure 8 Build button in Simulink'' | ||
| + | |||
| + | |||
| + | After a licensing notification, Matlab will call up the GNU ARM Toolchain to convert your model to machine code. After the S file is ready, Matlab will start the Microboot program to flash the code to the Olimexino. A similar window to that of Figure 9 should pop up. Reset your Olimexino to flash the program. | ||
| + | |||
| + | [[File:p1figure9.png|400px]] | ||
| + | |||
| + | ''Figure 9 Microboot waiting for target reset'' | ||
| + | |||
| + | |||
| − | |||
[[HANcoder/Examples/AutomaticLightControlSystem/4| '''Go to part 4''']] | [[HANcoder/Examples/AutomaticLightControlSystem/4| '''Go to part 4''']] | ||
Revision as of 14:53, 8 November 2017
LED Control System Part 3
Part 3: Compiling the model and flashing it onto the Olimexino
The Simulink model is now ready to compile and be programmed to the Olimexino. Build your model.
Figure 8 Build button in Simulink
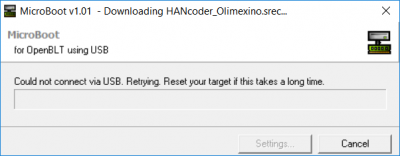
After a licensing notification, Matlab will call up the GNU ARM Toolchain to convert your model to machine code. After the S file is ready, Matlab will start the Microboot program to flash the code to the Olimexino. A similar window to that of Figure 9 should pop up. Reset your Olimexino to flash the program.
Figure 9 Microboot waiting for target reset

