Difference between revisions of "HANcoder/Training Material/CAN Communication"
| Line 8: | Line 8: | ||
== Model == | == Model == | ||
| − | [[File:CANcommunicationModel.png| | + | [[File:CANcommunicationModel.png|600px]] |
== CAN config == | == CAN config == | ||
[[File:CANcommunicationConfigMaskSettings.png|400px]] | [[File:CANcommunicationConfigMaskSettings.png|400px]] | ||
| − | + | In the top left of the model the 'CAN config' block is placed. Double click it to open the settings window as shown above. The baudrate is chosen to be 500kbis/s, this is a commonly used baudrate in cars. The 'Recepetion filter mode' is set to receive both the standard, 11-bit, as the extended, 29-bit, messages. No filtering based on identifier is needed so those options are left at 0. The transmit buffer is set to 32 messages, with this setting it is possible to send 32 CAN messages at once in total. Note that when CAN is used for connecting HANtune the messages for HANtune also end up in this buffer. This means that when 2 CAN send blocks are used in the model, there is room left for 30 HANtune signals. The 'Event buffer size' can be left unchanged. | |
| − | |||
| − | |||
== CAN send == | == CAN send == | ||
[[File:CANcommunicationMaskSettingsCANsend.png|400px]][[File:CANcommunicationMaskSettingsCANsendExt.png|400px]] | [[File:CANcommunicationMaskSettingsCANsend.png|400px]][[File:CANcommunicationMaskSettingsCANsendExt.png|400px]] | ||
| + | |||
| + | Note the difference between the two CAN send blocks. One is using the | ||
== PCAN view == | == PCAN view == | ||
[[File:CANcommunicationPCANview.png|400px]] | [[File:CANcommunicationPCANview.png|400px]] | ||
| + | |||
| + | |||
| + | == CAN Receive == | ||
| + | |||
| + | [[File:CANcommunicationMaskSettingsCANreceive.png|400px]][[File:CANcommunicationMaskSettingsCANreceiveExt.png|400px]] | ||
| + | |||
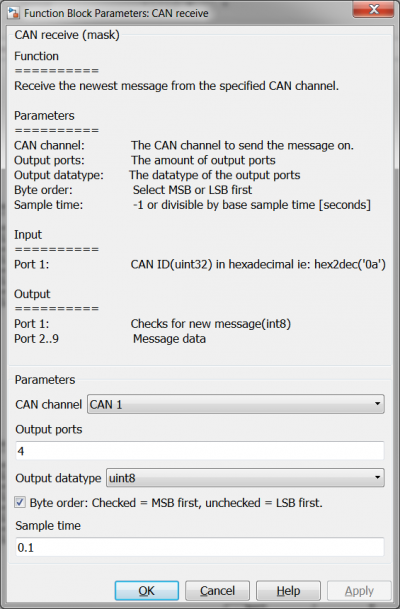
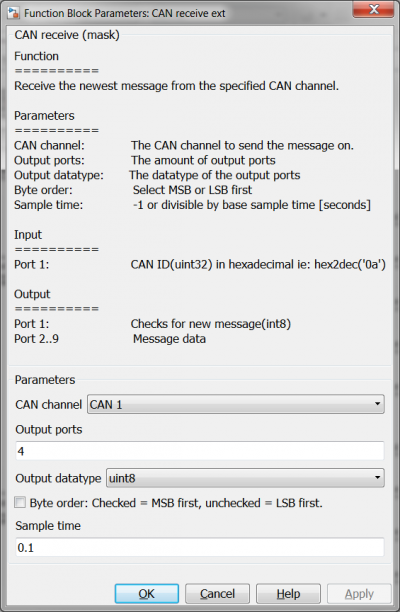
| + | Note there is almost no difference in settings between the two CAN receive blocks. There is also no difference in how the data is received because the data is sent 1 byte at a time, the byte order has no influence in this case. | ||
== HANtune configuration == | == HANtune configuration == | ||
[[File:CANcommunicationXCPonCANmaskSettings.png|400px]] | [[File:CANcommunicationXCPonCANmaskSettings.png|400px]] | ||
Revision as of 12:40, 14 April 2017
Contents
Description
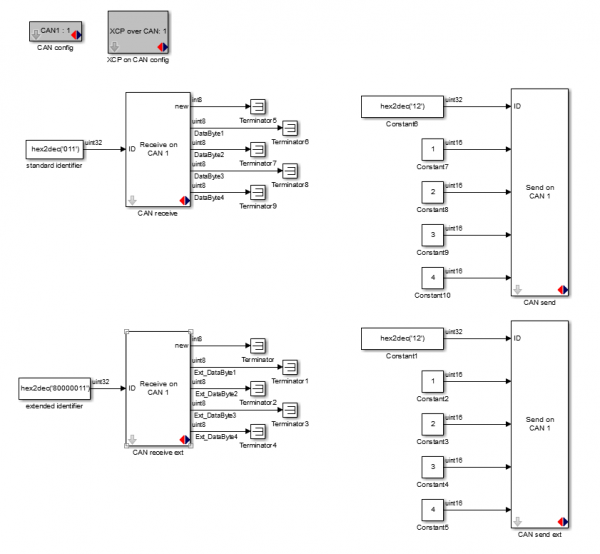
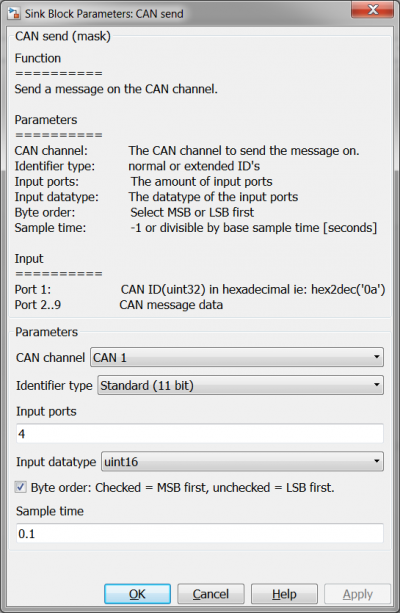
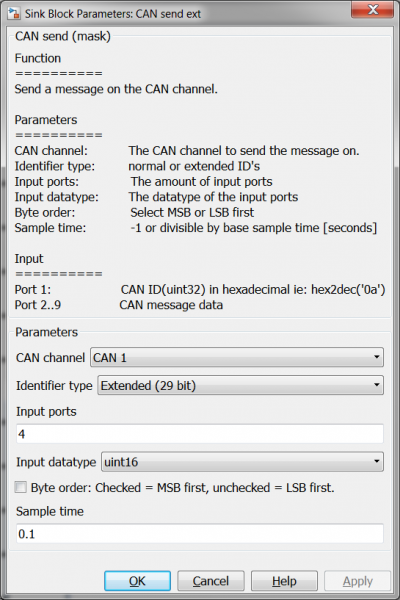
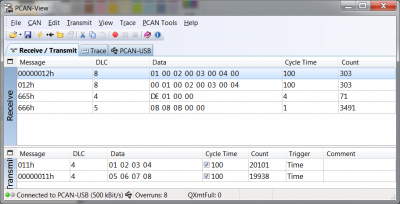
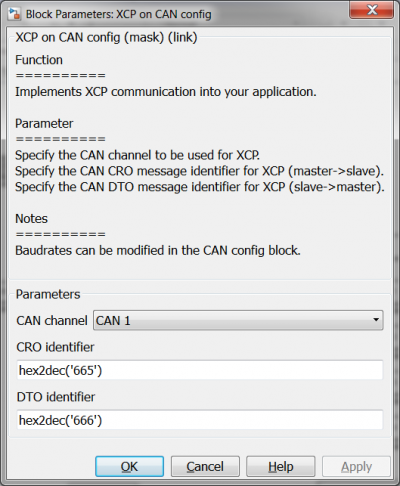
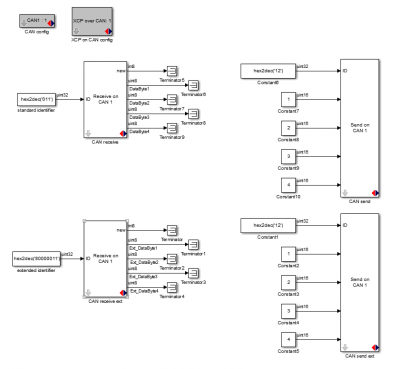
This example model shows how to use the CAN receive, CAN send, CAN config and XCP on CAN config blocks. The model sends two CAN messages, one message with a standard identifier of 0x12 sending four uint16's and sending the Most Significant Byte first, the other message sends the same data but with an extended identifier of 0x000012 and the Least Significant Byte first. Also two CAN messages are received, one with standard and one with extended identifier. The data that is being received in these messages is of type uint8. The 'CAN config' block is used to enable the CAN peripheral of the micro controller and the 'XCP on CAN config' block is used to enable communication with HANtune over the CANbus.
Model
CAN config
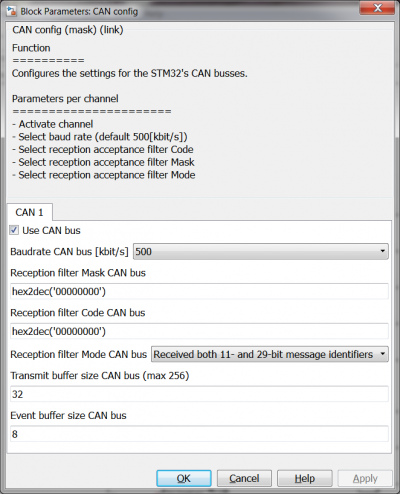
In the top left of the model the 'CAN config' block is placed. Double click it to open the settings window as shown above. The baudrate is chosen to be 500kbis/s, this is a commonly used baudrate in cars. The 'Recepetion filter mode' is set to receive both the standard, 11-bit, as the extended, 29-bit, messages. No filtering based on identifier is needed so those options are left at 0. The transmit buffer is set to 32 messages, with this setting it is possible to send 32 CAN messages at once in total. Note that when CAN is used for connecting HANtune the messages for HANtune also end up in this buffer. This means that when 2 CAN send blocks are used in the model, there is room left for 30 HANtune signals. The 'Event buffer size' can be left unchanged.
CAN send
Note the difference between the two CAN send blocks. One is using the
PCAN view
CAN Receive
Note there is almost no difference in settings between the two CAN receive blocks. There is also no difference in how the data is received because the data is sent 1 byte at a time, the byte order has no influence in this case.
