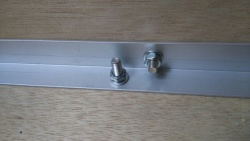
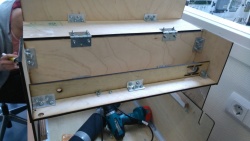
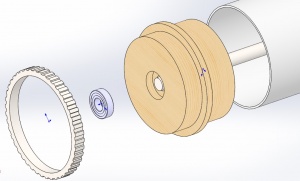
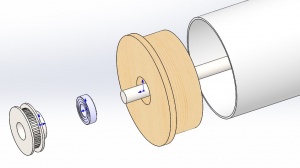
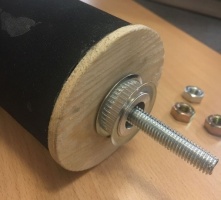
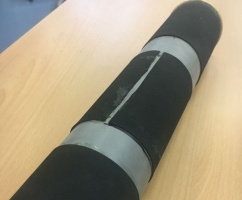
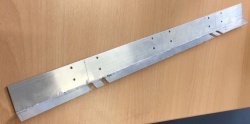
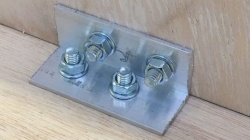
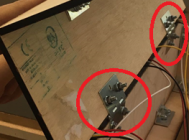
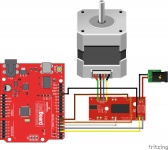
Use the same aluminum profiles as the conveyor belt box to attach all the panels to each other.
On top of the front panel the piano hinges are mounted to create the cover. (ADD 2 PICTURES: HINGES AND PROFILES)
To mount the lane change mechanism a bracket is needed. The dimensions of the bracket are located on the drawings.
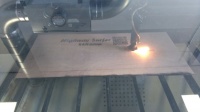
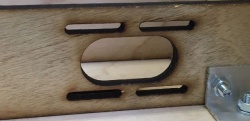
The bracket is laser cut. The slots are used to tension the belt.
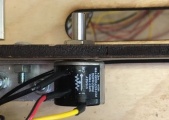
On the other side, there is a hole for the potentiometer.
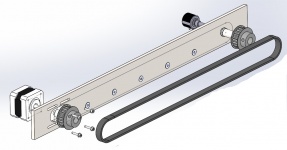
For the lane change mechanism, the 2 tooth wheels are fitted, one on the potentiometer that reads the position of the car and the other one on the step motor that creates the linear movement.
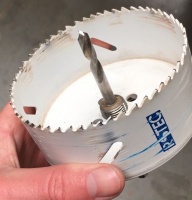
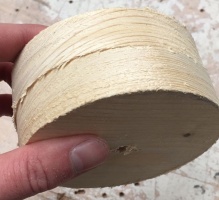
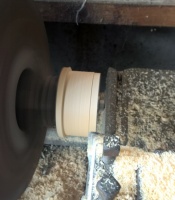
The custom bushings are needed to get the tooth wheels fitted on the step motor and potentiometer.
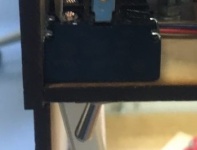
On the bottom of the bridge a switch is mounted to turn on the demo.
| Bracket |
Potentiometer |
 |
 |
The custom bushings are needed to get the tooth wheels fitted on the step motor and potentiometer.
On the bottom of the bridge a switch is mounted to turn on the demo.
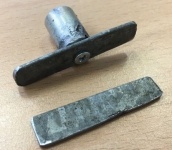
The clamp that is used to hold the car is made from sheet metal and a threaded bushing.
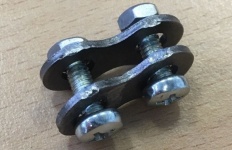
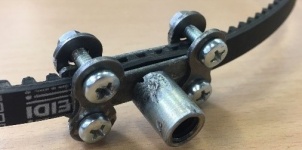
The pieces of sheet metal are cut and clammed together with the chain links around the belt with the m4 screws and nuts.
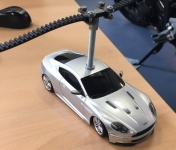
Drill a hole in the roof of the model car and place the threaded bushing. Then a piece of wire rod is used to connect the car to the clamp on the belt.
| Exploded view lane change mechanism |
Bushing |
Clamps |
Belt clamp |
Car |
 |
 |
 |
 |
 |
Electronical
In this chapter, the electronical building process is explained. In the first subchapter connecting all the sensors and actuators to the Olimexino micro controller.
The second subchapter contains the installation of the electronics in the demo.
The electronic circuit
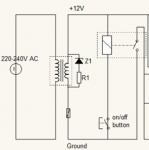
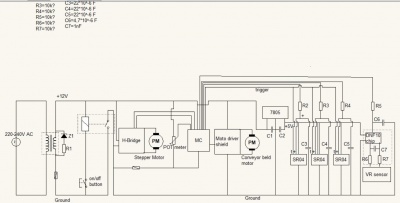
This is the final version of our electric scheme. Each individual component will be ran down separately validating the choices and verifying the values of resistances and capacitors.
Each of the components is are linked in series with the power output of the transformer or 7805. (PICTURE ELECTRONIC CIRCUIT)
Power supply
Most of the components work on 12V. To get the 12V we used a 60hz transformer. Reasons for this were the low costs compared to a battery.
To power the ultrasonic sensor and the DNF10 sensor we used a 7805voltage regulator because it’s the cheapest option available.
The switches
We have attached an emergency button and on off switch to the ground of the. Both of the buttons power a coil what opens a relay.
The emergency button relay is closed by default, while thee on off switch is open by default.
This is because in rest and with the emergency button pressed there should not be any electricity through the system.
The stepper motor
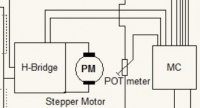
The PM engine will be controlled by a H bridge, in our case the “Ardumoto - Motor Driver Shield”.
The reasoning we chose for an H-bridge is that the PM needs to be controlled in two directions, an H-bridge can change the direction by switching the poles easily.
Other advantages of an H-bridge are that the protection for peek tensions is already build in. The H-bridge is connected twice with the micro controller.
Once for the direction, and once for the duration and speed.
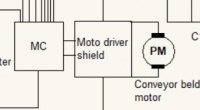
The conveyor belt motor
The PM motor is being controlled by the micro controller with PWM duty cycle. We used a P channel MOSFET to switch the motor on and off again.
To protect the MOSFET we used a 1kO resistance. To manage outflow in case the MOSFET is turned off we used a high 10kO resistance.
Ultrasonic sensors (SR04)
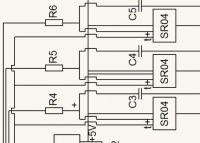
The Ultrasonic sensors are connected to the micro controller twice, once for the micro controller to trigger the sensors and for the sensor output.
To protect the circuit from voltage peaks from electromagnetic waves caused by the transformer filtering techniques are used.
The filters contain one capacitor and resistance. For each resistance 10kO is common. In the circuit R4=R5=R6=10kO.
Also, C3=C4=C5. To determine the C values, the filter frequency need to be calculated first.
To get the filter frequency (Fc) from the ultrasonic sensor to following recommended measurement cycle(t) of 60 [ms] is used.
These values are found in the specifications of the ultrasonic sensors.
F = frequency
F = 1 / t
F = 1 / 0,06
F = 16,667 [Hz]
Fc = F * x
Fc = 16,667 * 50
Fc = 8833 [Hz]
Fc = 1 / (2pRC)
C = 1 / (2pRFc)
C = 1 / (2p*10000*833) = 19.1 [µF]
VR sensor and DNF10 chip
The configuration of the chip has been given, and the values of R8, R9 and C7 are in the specifications.
The configuration converts a sinus wave into a block wave. It only has one output towards the micro controller.
The VR sensor also has a capacitor and resistance to filter.
To measure the frequentation coming from the VR sensor we need to know the amount of tooth on the gear it measures and its RPM.
The RPM is identical to the RPM max of the model craft electronic motor. (PICTURE VR SENSOR)
Nmaxmotor = 53 RPM at 12V
To simulate the increases of voltage a maximum RPM of 70 at > 12V is used.
N = 70 [min-1] = 70/60 = 1,16667 [sec-1]
Z = 44
F = N * Z = 1,166667 * 44 = 51,333 [Hz]
Fmax = F * A= 51,333 * 1,5 = 76,9999 [Hz]
Fc filter = Fmax * x = 76,9999 * 50 = 2,85 [KHz]
Fuses
A 2 [A] fuse and a 7,5 [A] fuse is needed in the system for the peak current.
The 2 [A] fuse that is located under the micro controller will burn when there is more than 2 Amperes
in the system because of the risk that the micro controller can’t handle the current.
The 5 [A] is needed for the rest of the system that the components won’t burn through.
Installation
Different electric schemes for each of the components are being used in this chapter. The main scheme can be found above.
For clarification, some pictures are mirrored to make them correspond with the pictures from the back side.
If a part is marked with red it’s not involved in the electric scheme. (Full Electric scheme)
The ground and source
| Connection diagram |
Ground and source |
 |
 |
Every electric circuit starts with a ground and a source. So, it would only be logical to start connecting this circuit first.
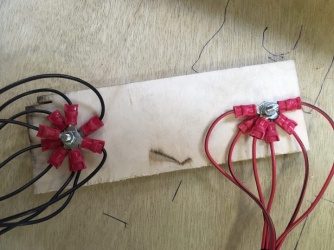
To connect all the ground and source wires we are using a star point.
A start point is used to prevent ground loops in the system.
Only a few ground wires from the filters are being connected before the ground star.
This is because the electricity through these wires is so small that the chances of ground loops here are slim.
The ground star has been made using a screw and bold what compresses multiple wires with spacers in-between.
This way all the wires make contact if the screw is tightened enough.
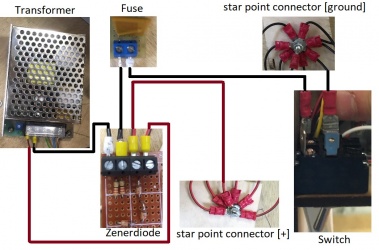
As seen in the electric scheme in between the transformer and the ground stars there are a few extra components.
The fuse, the Zener diodes and the switch.
Before we go in depth with each of the components there is a simple version of how everything is connected according to the main electric scheme.
The transformer
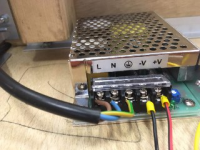
To connect the transformer there are 5 wires what need to be connected. The first three wires are from the plug.
Connect them according to the symbols on the transformer or according to the picture above.
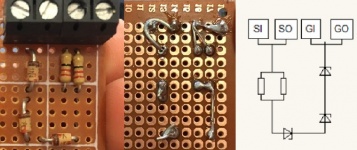
The Zener-diode
Following the source wire from the transformer, the next component is the Zener diode. This diode is there to protect the system from voltage peaks.
It’s switched parallel directly with the transformer. Because a PCB is being used, all the connections are made with screw blocks.
Because there was no Zener diode of 18 V available 3 Zener diodes of 6.5V are linked in series.
PART JORDY SI (source input) and GI (ground input) are directly from the transformer,
while SO (source output) and GO (ground output) are connected to the rest of the circuit.
The fuse
(Figure 12)
The fuse is just a fuse switched in series. For our design, it’s connected to the ground.
It’s placed on a PCB. Since it’s a two-way fuse it doesn’t matter which way it is connected.
The switch
The switch in the electric scheme is shown as a parallel on/off button with a coil and a relay in series.
The on/off button and its electric coil are built into the component what is being used.
That means the component can be switched in series like the relay.
Just like the fuse it doesn’t matter which way it is connected. Make sure to note when the switch is on or off.
The PCB
PCB’s (Printed Circuit Board) are used as screw blocks to connect the wires. Screw blocks are to connect or disconnect.
Besides that, they are very cheap and easy to apply. To connect these blocks iron wire is used and soldered with tin.
The screw blocks are white blocks in the electric system.
The high frequency filters
All the long wires in our system function as antenna’s that are exposed to the EMI (Electromagnetic interferance)from the transformer.
To filter these frequencies a combination of resistances and capacitors is used. Using a PCB for these resistors and capacitors is convenient.
The values can be found in the main electric scheme. [IO] are the inputs from the ultrasonic sensors,
[OU] is the output of the filters from the ultrasonic sensor,
[-] is ground and [OC] with [IC] are the respective input and output from the chip that is connected to the micro-controller.
The low voltage circuit
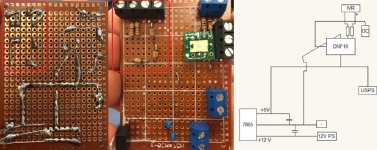
The second PCB is mostly used to supply the components that run under 4 V instead of 12 V. These are the Ultrasonic sensors and the DNF10 chip.
The DNF chip is connected due the max 9240 specifications. The [-] screw block is connected to the ground while the [12V PS] is connected to the power source.
The combination of the 7805 and the capacitors will create a 5 V power source on the third pin. The capacitors are connected due the specification of the manufacturer.
The [OC] screw block is the output of the chip and is connected to the micro-controller.
The [USPS] is the ultrasonic sensor power source and is connected to the ultrasonic sensors’ VCC.
And at lasts the IVR is the input of the VR sensor. Be aware that the + side of this output needs to be connected to the proper side of the chip.
The micro-controller
The microcontroller is directly connected with the ground and source stars with an extra fuse in series for protection.
Software
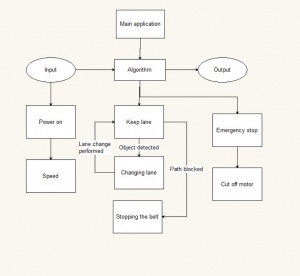
The software is split up into 3 main parts. The input, the algorithm and the output. Each of these can be edited in the HANcoder software by double clicking the blocks. In the input block the inputs of the sensors are defined. In combination with the Simulink blocks it is possible to translate the sensor output to an input for the algorithm. The algorithm is the main logic of the code. The output would then provide the actuator with information on what needs to be done. (Figure 3 Complete software)
Input
The input gets data from the sensors. For this system, we need to translate the output of 3 types of sensors. 3 ultrasonic sensors, 1 potentiometer and 1 rotation speed sensor. Below we can see how this is done using HANcoder.
Position Sensor
From the potentiometer, we get a certain voltage. If we multiply the voltage by 1/4096 and 1.065. In combination with the constant we can get the position of the car. (Figure 4 Position sensor)
Speed Sensor
The output of the rotation sensor is a sinus signal, but in combination with the interface chip it will be a block signal. With the 'timer input get' block out of the HANcoder library it is possible to get the frequency out of the block signal. If you multiply the frequency by: 2*Pi*0.04*1/44 it will give the speed of the roll as an input for the algorithm. (figure 5 speed sensor)
Ultrasonic Sensor
Ultrasonic sensors emit short, high-frequency sound pulses at regular intervals. If they strike an object, then they are reflected as echo signals to the sensor.
(Figure 6 ultrasonic sensor)
Algorithm
In Figure 7, we can see the algorithm that deals with the car position, the lane change and the lane selection system. The three blocks are the most important part of the algorithm.
For detecting the position of the car, a potentiometer is used. In the input, the value from the potentiometer is transformed to meters. In this state flow the car position is detected by the logic. The output is a value 1, 2 or 3. The algorithm uses the value to determine which part of the next state flows is used.
(Figure 9)
In Figure 9, the lane selection system is shown. With the values from the car position detection one of the three state flows is selected. The multiport switch gives a lane (1,2,3) that is desired to go to. If all the lanes are blocked, the StopBelt output will be 1(Boolean).
(Figure 10)
This is the state flow when the current lane is lane 1, as shown in Figure 10. The three lanes have a logic connected in a triangle. This means if the car is in lane 1, it’s possible to go to either lane 2 or lane 3. For the other state flows, please look at the software.
(Figure 11)
The logic for the rotation direction of the stepper engine is shown in Figure 11. The value of the desired lane and the current lane are compared by a plus minus block. The block takes the value of the current value minus the value of the desired lane. With the other blocks the on/off for the stepper engine is 1 or 0. The direction is 0 or 1.
(Figure 12)
Output
LED
This output is for the test led on the Olimexino.
By changing the frequency, it is possible to see if
the new software is flashed correctly.
Direction roll
This is a digital output for the driver board.
When changing this output from low to high and
high to low the direction of turning from the
electric motor will change. With this demo the
direction won’t change, so this output is constant.
Speed step
This digital output controls the speed of the
stepper motor.
Resolution 1 & resolution 2
These two outputs are used to determine the resolution of the
stepper motor. In total there are 4 combinations (2 ports, high and low).
The resolutions changes from a full step to a half, a quarter and an eight step.
Belt Speed desired
This output is used to control the speed of the conveyor belt.
By HANtune it is possible to control the speed.
Since the motor driver needs a PWM signal,
this is converted in the subsystem.
On/Off step
This digital output is used to control the stepper motor.
Direction Step
This digital output is controls the direction of the stepper engine.
The direction will change is when the output is changed from low to high and high to low.
Trigger frequency
The trigger frequency is used to control the ultrasonic sensors.
By triggering the sensors, they will measure the distance to an object.
